Studio Space
For the past 3 years I've been working in our undeveloped basement: cement walls and floors, no windows, one power outlet for about 6+ plugs and the need for a space heater close to my feet. In all honesty, I can list plenty of pros about my current studio, like the fact that I even have a space, however, in all my years of different studios, this one is less than ideal.
SO, this is the year my studio gets developed. I've dreamt up designs to include a window, plenty of storage, a desk that doesn't wobble every time I touch it and bright lighting.
The Back Story
This is the place to find out all about the new Studio and the progress, from start to finish. You’ll find plenty of photos, inspiration, and ideas for creating a home studio. Let’s get started.
I’m a dedicated and disciplined artist & art instructor with big dreams. For over 15 years I’ve wanted to be a full time practicing artist and I can now say I am. Pinch me!
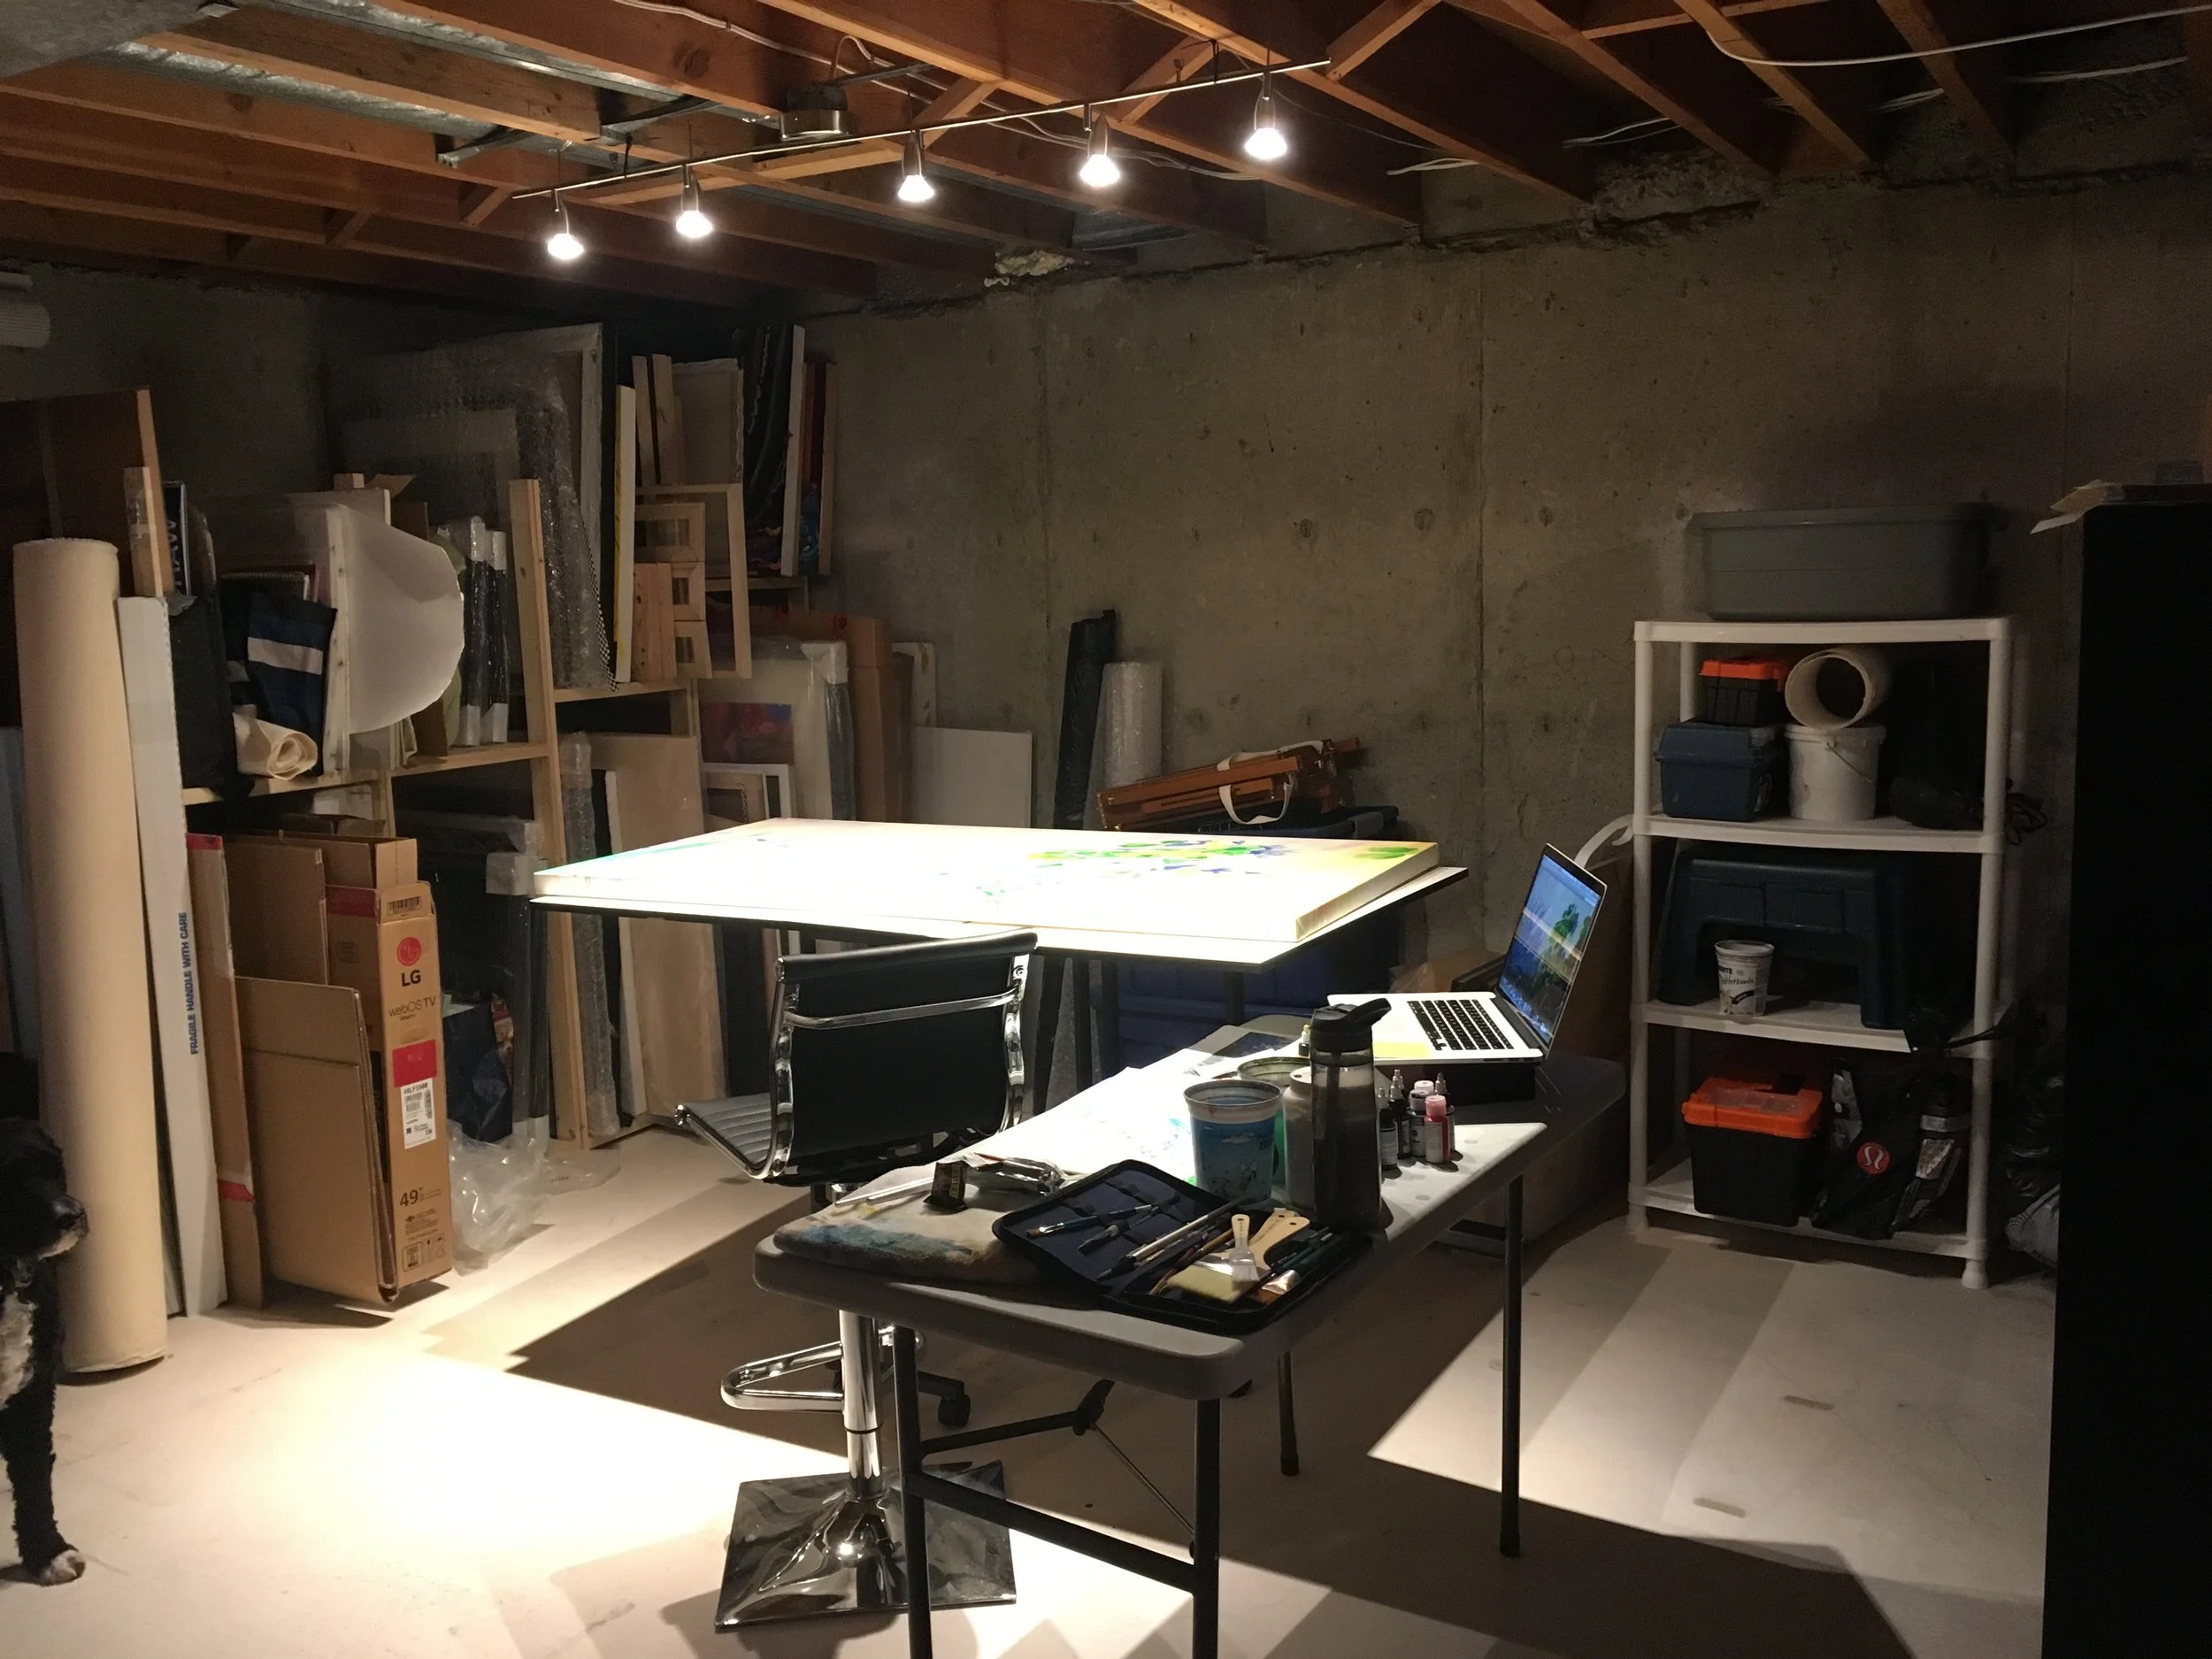
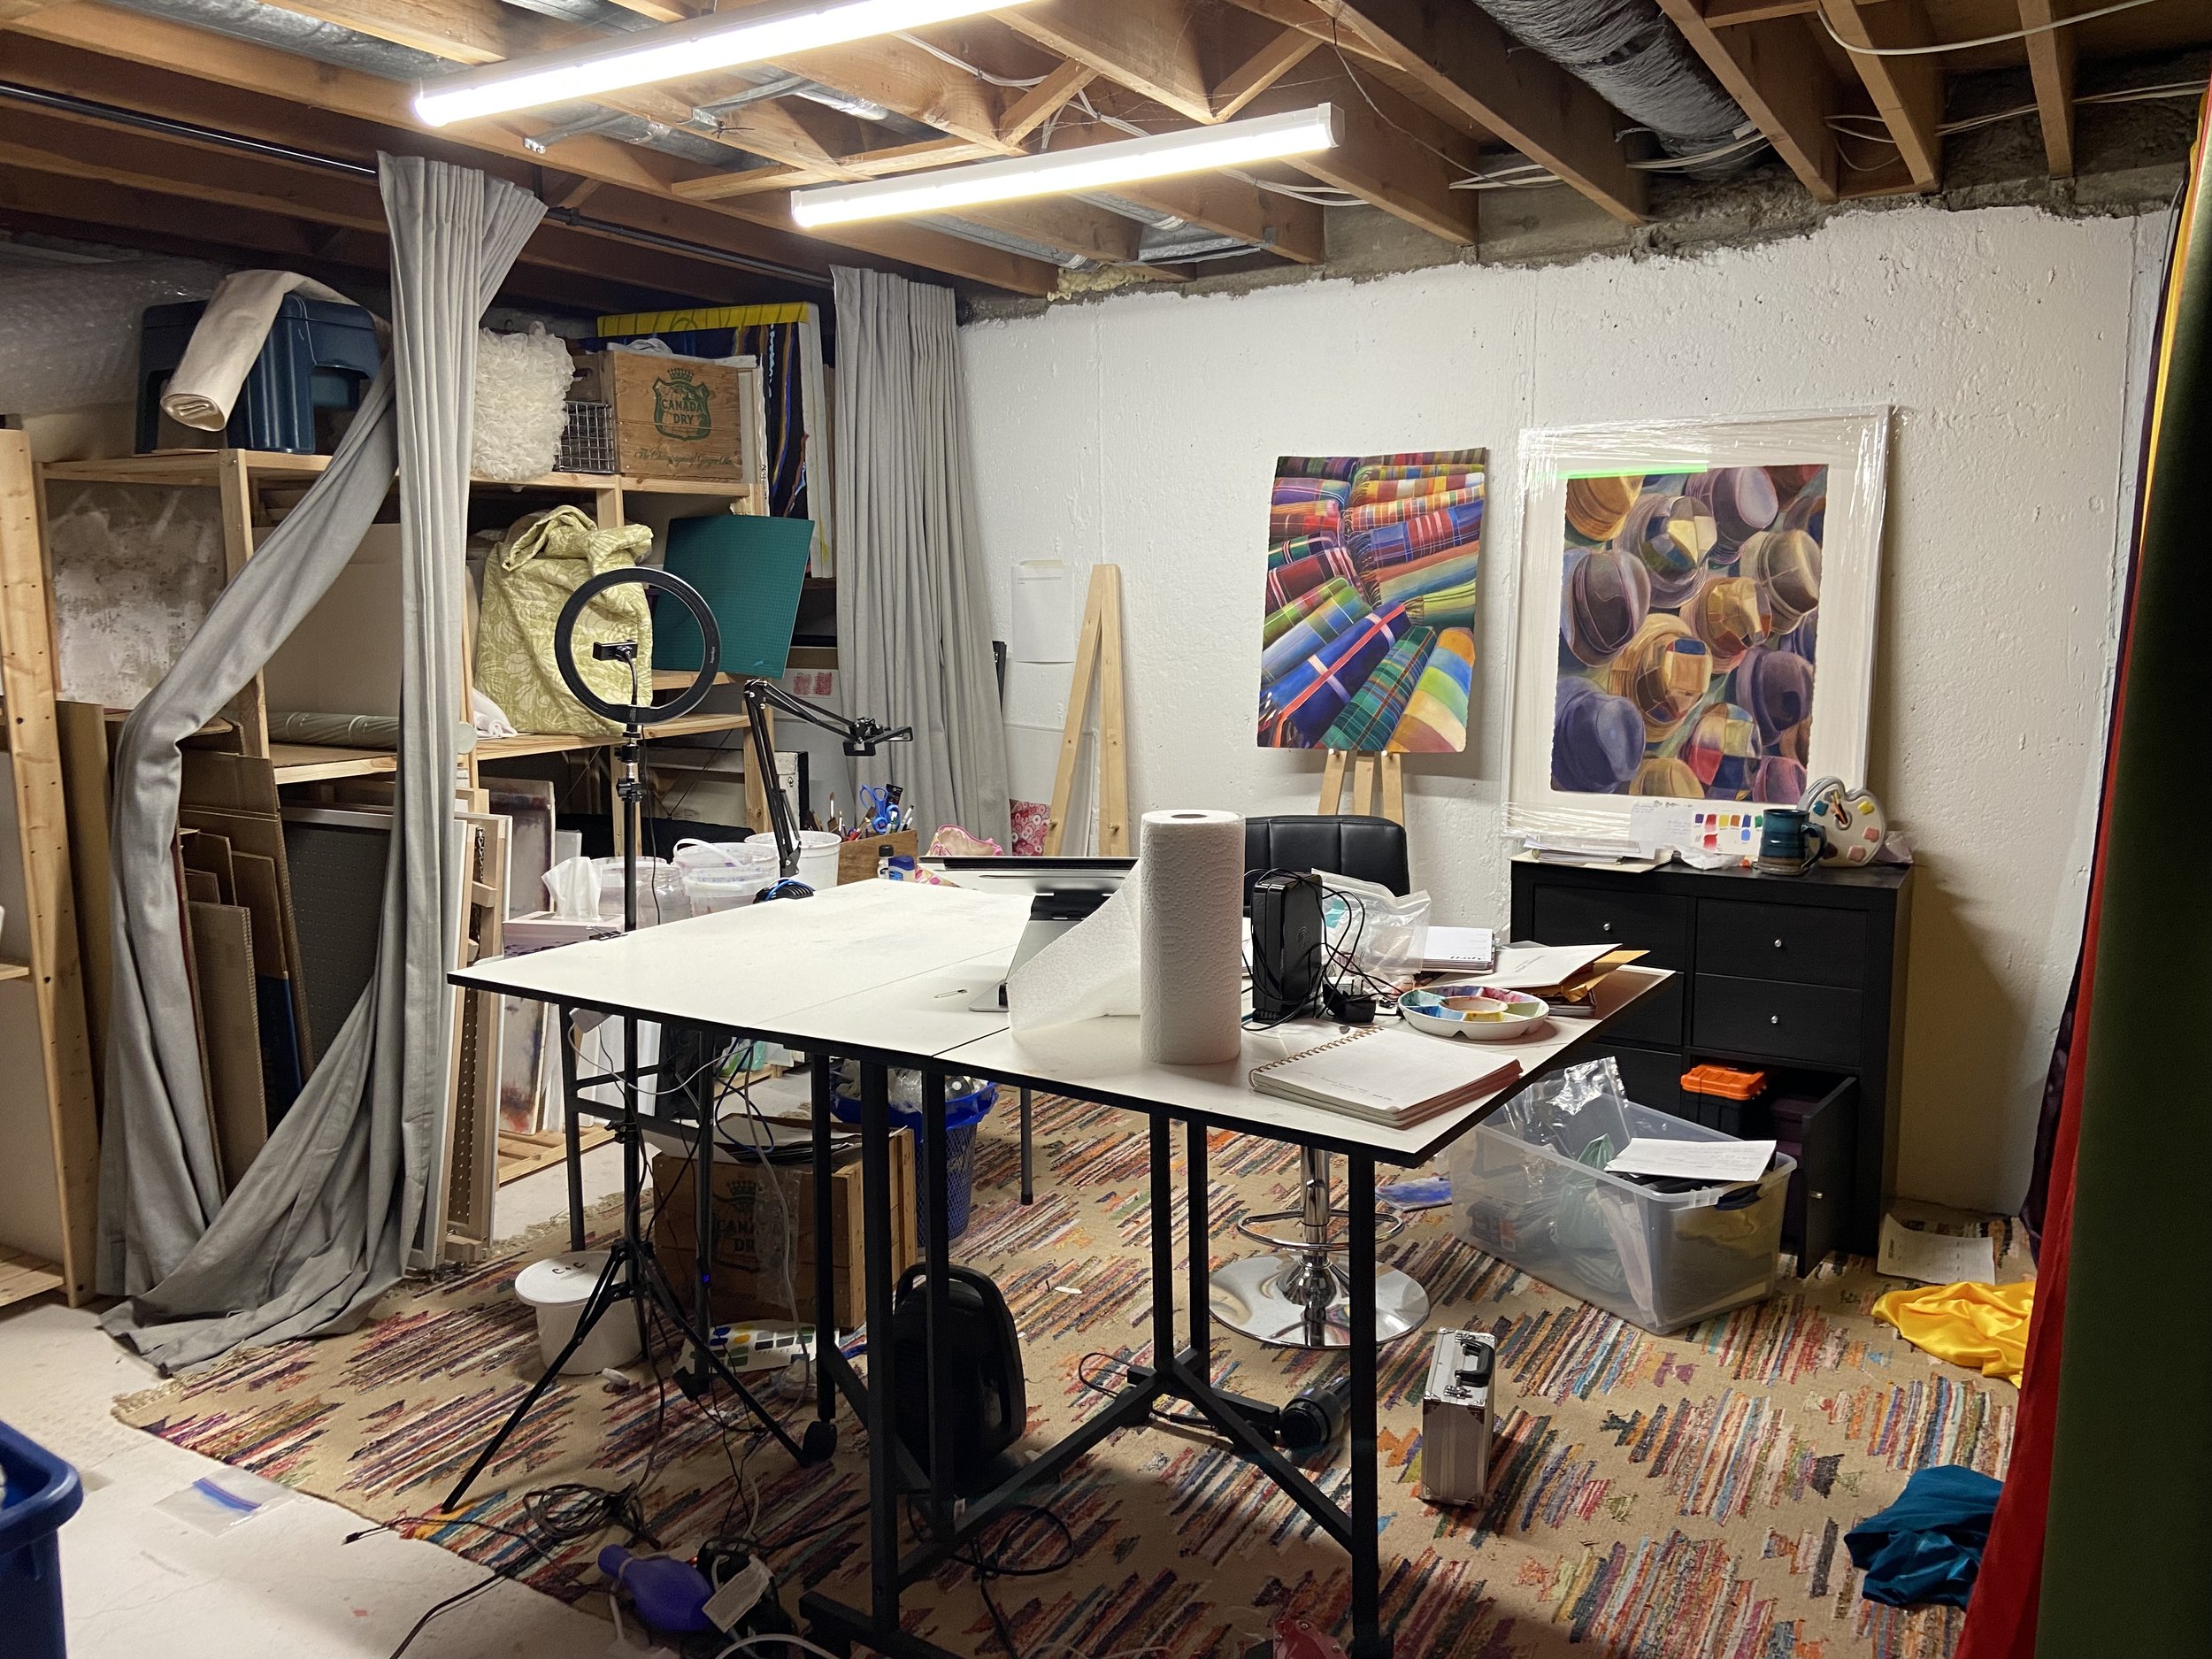
Imagine your work environment. Now imagine spending 1/3 of your life working in an environment like this (pictured above). The reality is, this is the space I work. Well, this is how it started out. I’ve spruced it up with paint, lighting, a rug and some curtains, which has been a treat since transitioning to full time hours. Big improvement right?
What you don’t see is this: an extension cord stretching from the one electrical outlet in the basement hosting a power bar filled with plugs. These plugs power my teaching tech tools (computer, iphone, internet router, light, blow dryer) and most importantly, the space heater. It also doubles as a place to plug in the bouncy castle when our toddler needs to burn energy opposite of the studio. We make it work!
What you also don’t see is the wobble in the desk and the daily switcharoo between teaching set up and painting set up. Oh and a window. Nope, we don’t see a window because there isn’t one.
The point is, we’ve made do with what we have. And now it’s time to grow. Abundant thinking right?
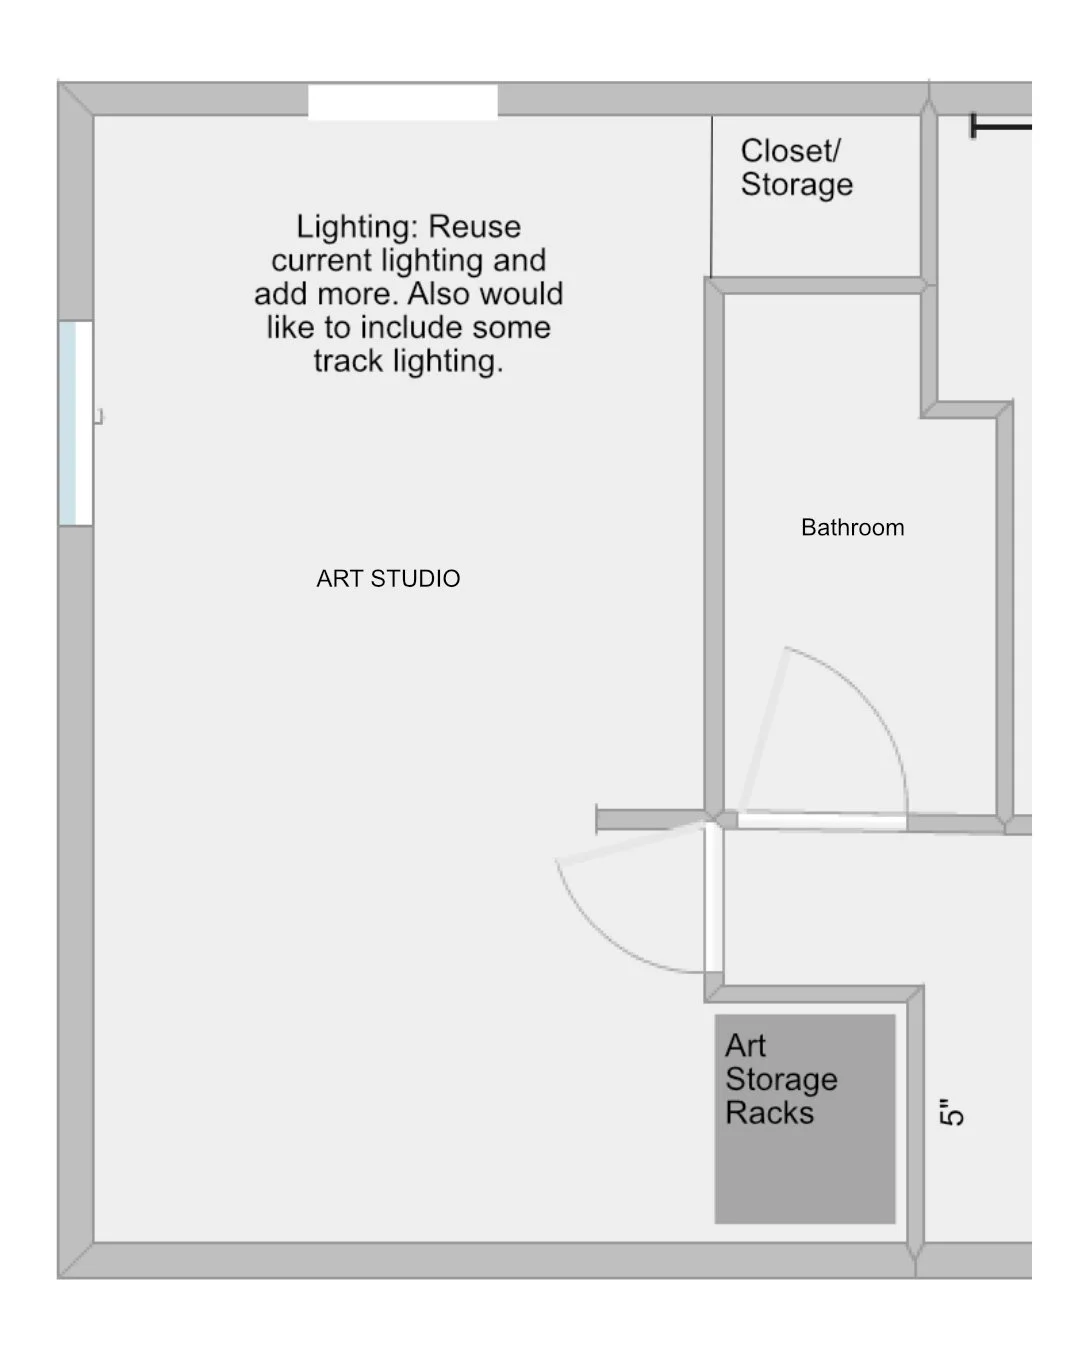
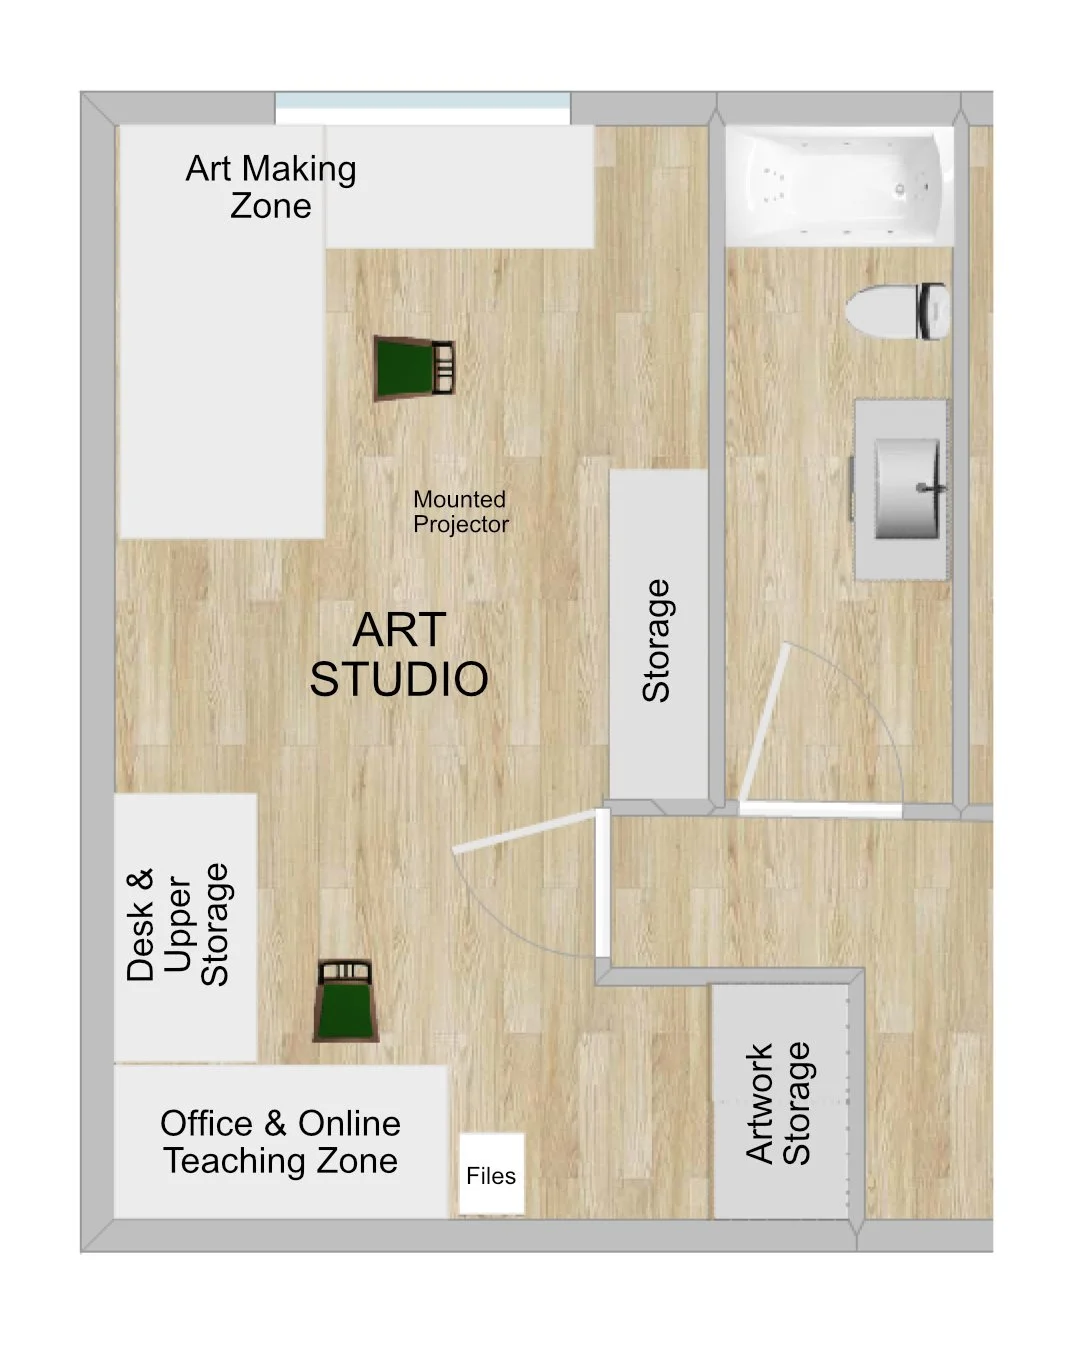
After what seemed like considering nearly 20 different floor plans, this was the final draft plan for the studio.
Framing
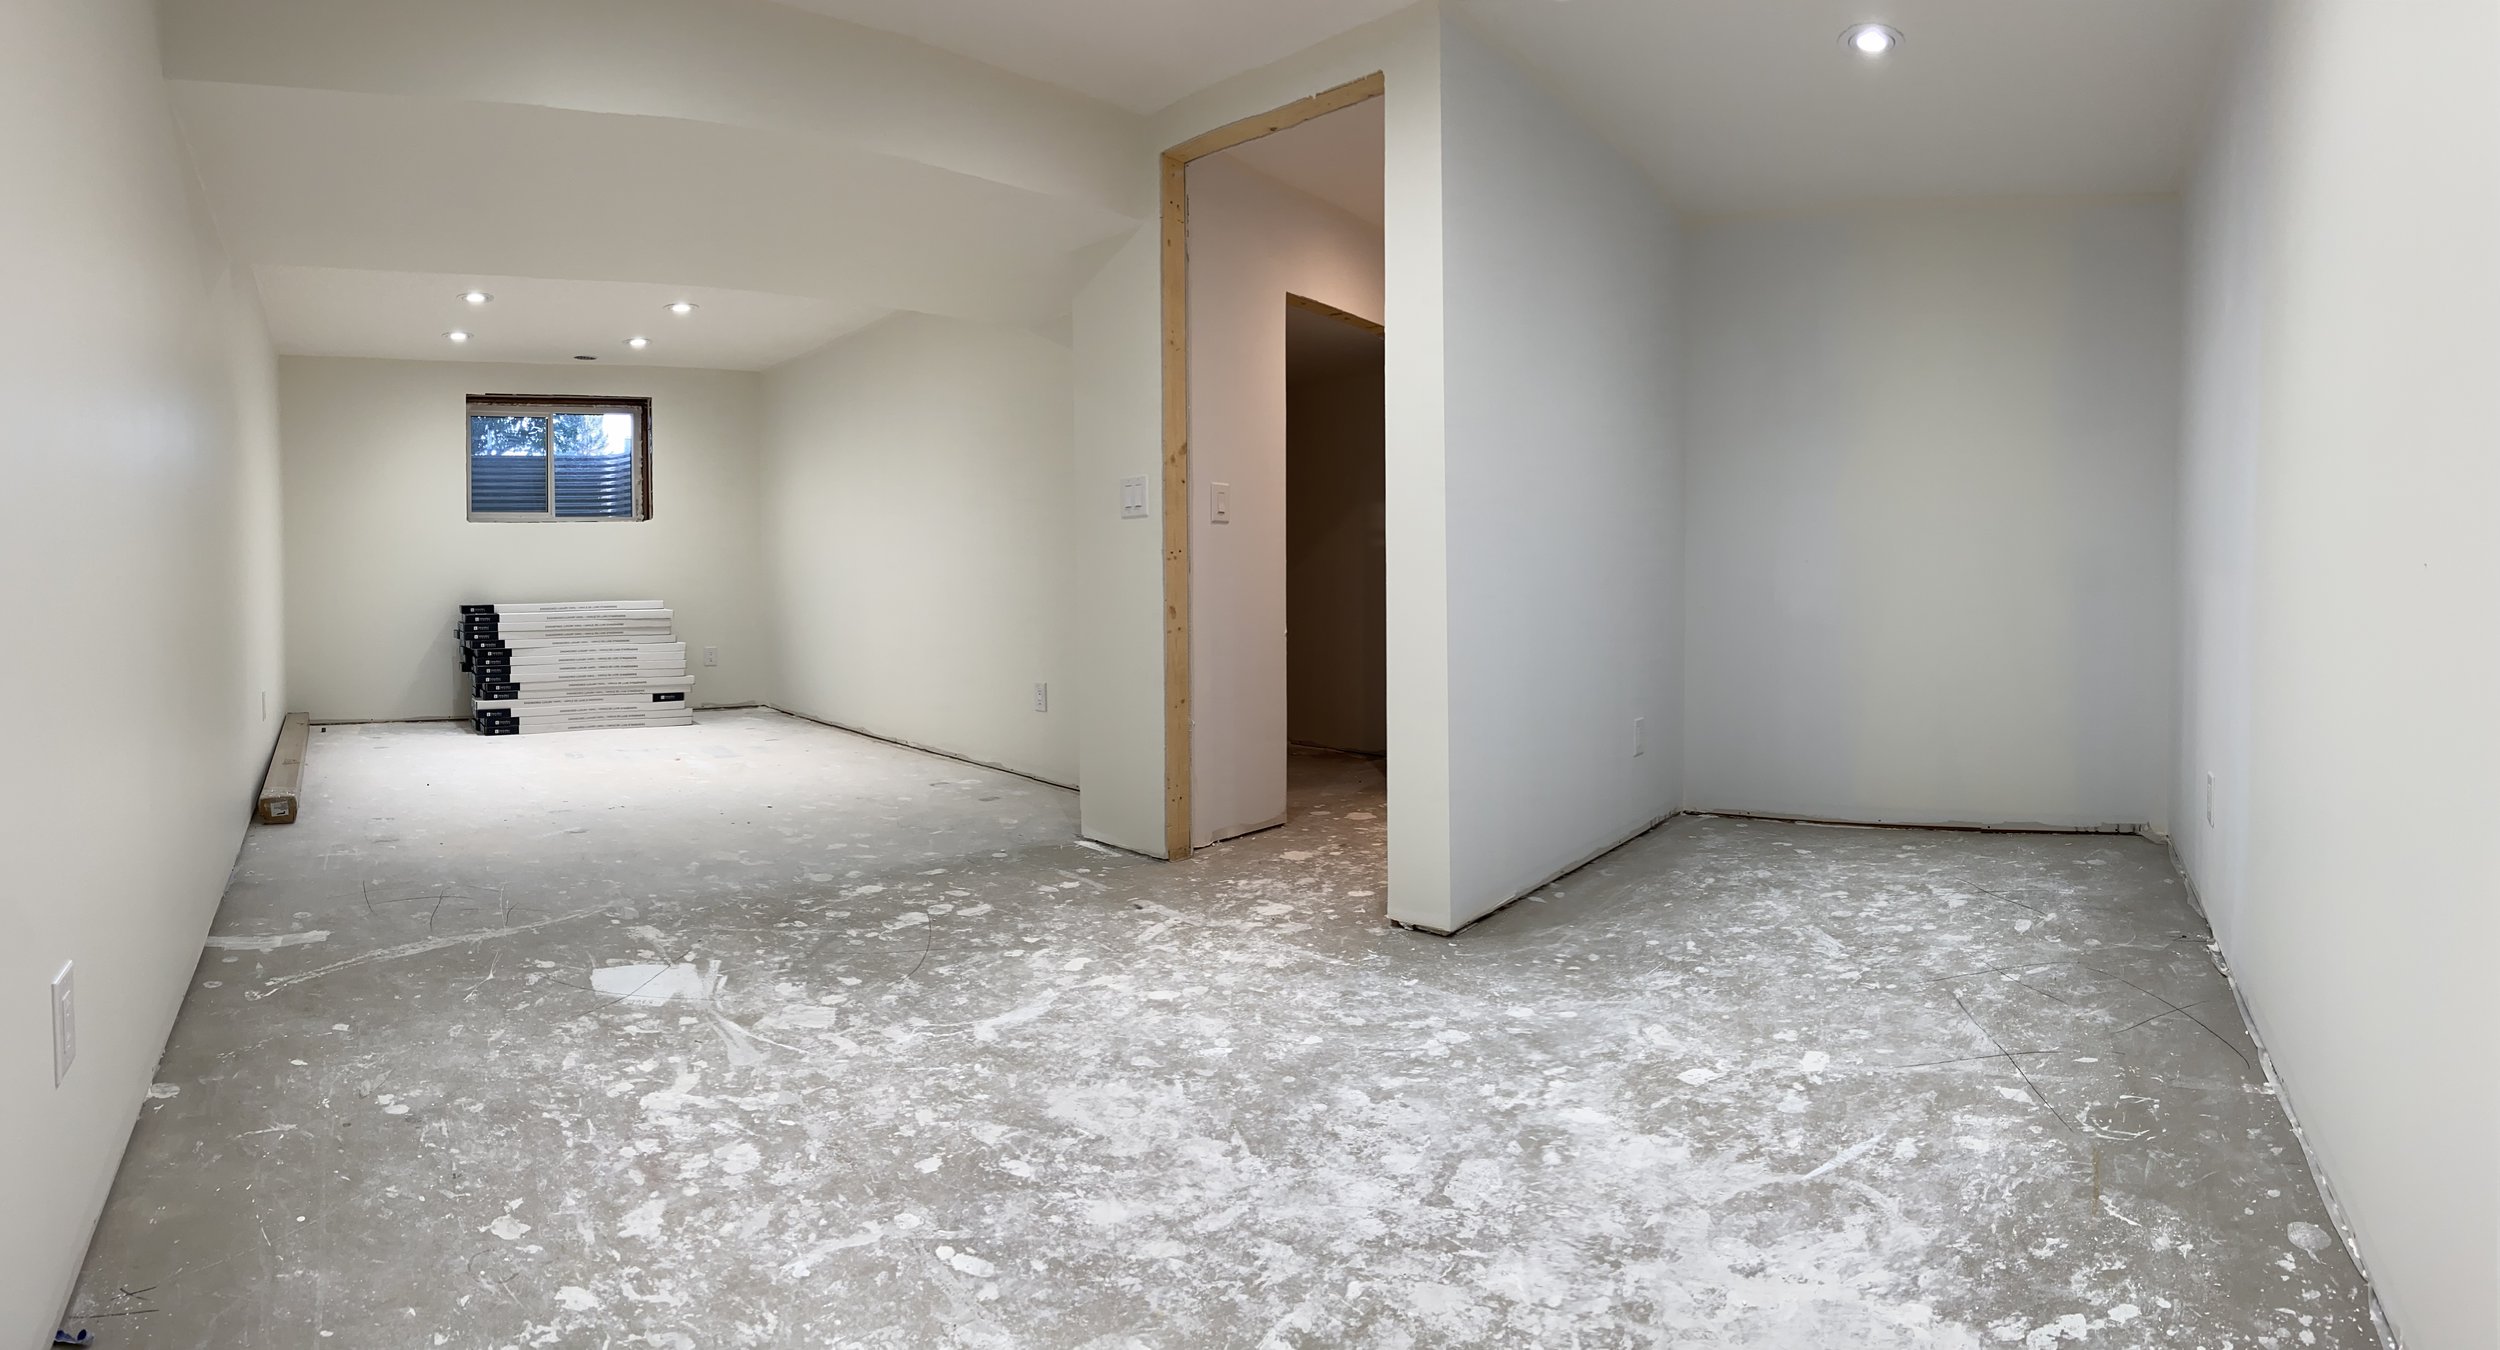
As the framers were putting the plan into reality, things changed. Suddenly there wasn’t as much space as once envisioned. Thankfully I work from home and was able to be there when they needed to make some game time decisions. I forfeighted the smaller closet in the studio, but gained an extra foot on each side of the art storage area.
Here is the new layout with the changes.
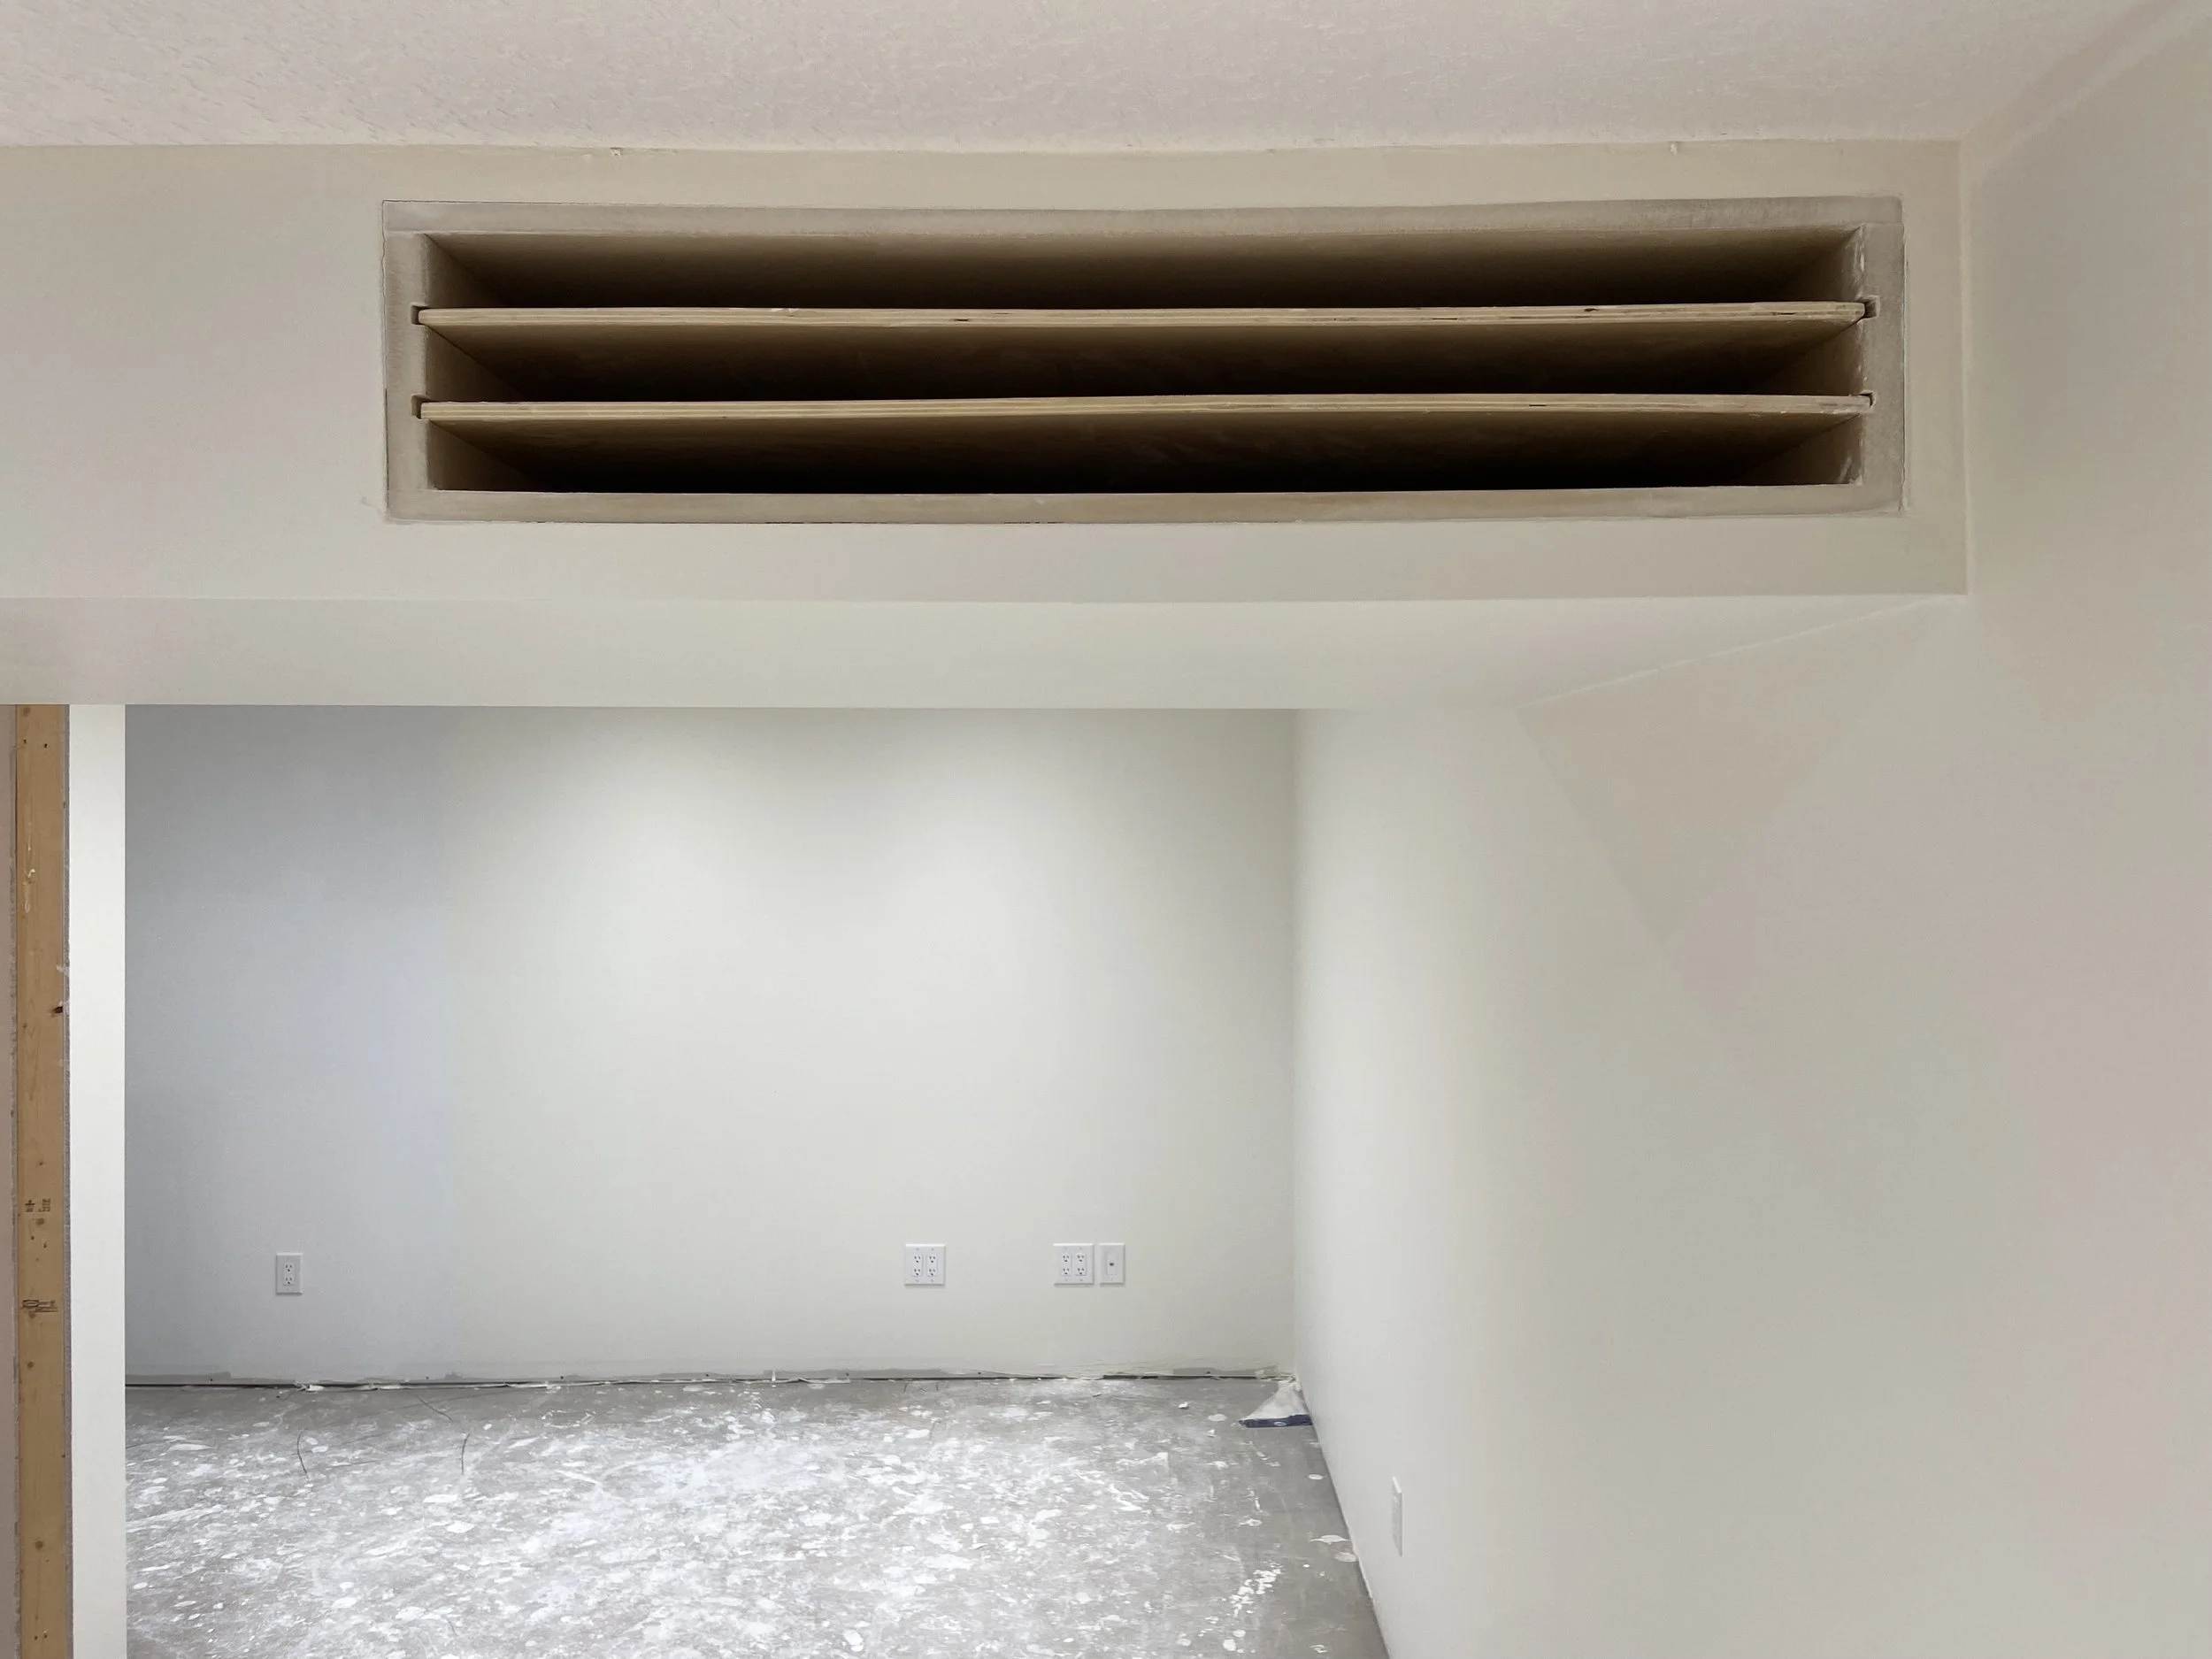
Also, there is a low bulkhead running through the studio which makes for quite a low ceiling height in that area, but we are able to turn a vacant portion of this bulkhead into additional ceiling storage! Yippee! I’m hoping for paper storage up there. It would be the perfect size.

Lighting
Lighting is crucial in an art studio. Ideally there is a north facing window, however I chose to put the window on the south side to let the sunrays shine in and see into our back yard.
Aside from real daylight, there are many factors to consider when it comes to electrical lighting. For me it was important for the lighting to be bright enough and have the right colour spectrum that replicates daylight. Also, I didn’t want any dim areas, so I opted for more lights spaced closer together.
Initially I planned for track lighting along one wall where my art would hang, but when I learned that gimbal lights swivel, I realized they can do double duty. I could swivel them if need be to light the wall, or light my work surface. Suddenly there was no need for a row of track lights in this small space. It’s not a gallery after all.
We ended up with six, 6” gimbal lights on one side of the studio and the same on the other side. The 6” option puts out higher lumens (brighter output) and a larger range of light. They are also as close as you can get to daylight colour spectrum as possible, but can be adjusted to warmer or cooler for different occassions.
Electrical
As for electrical outlets, we needed 3 separate circuits, one for standard plugs, one for a space heater, and another for use of a blow dryer. For tech set up, there is an ethernet cord from our upstairs modem down to the studio to hardwire internet connection, which is ideal when teaching live online. There are plenty of extra plugs for things like charging electronics and extra teaching lights.
Oh, and hidden on the side of the bulkhead near the ceiling is a extra plug. I wanted to mount my digital projector to the ceiling and this little plug means no hanging cords! Splendid.
Fine Finishes
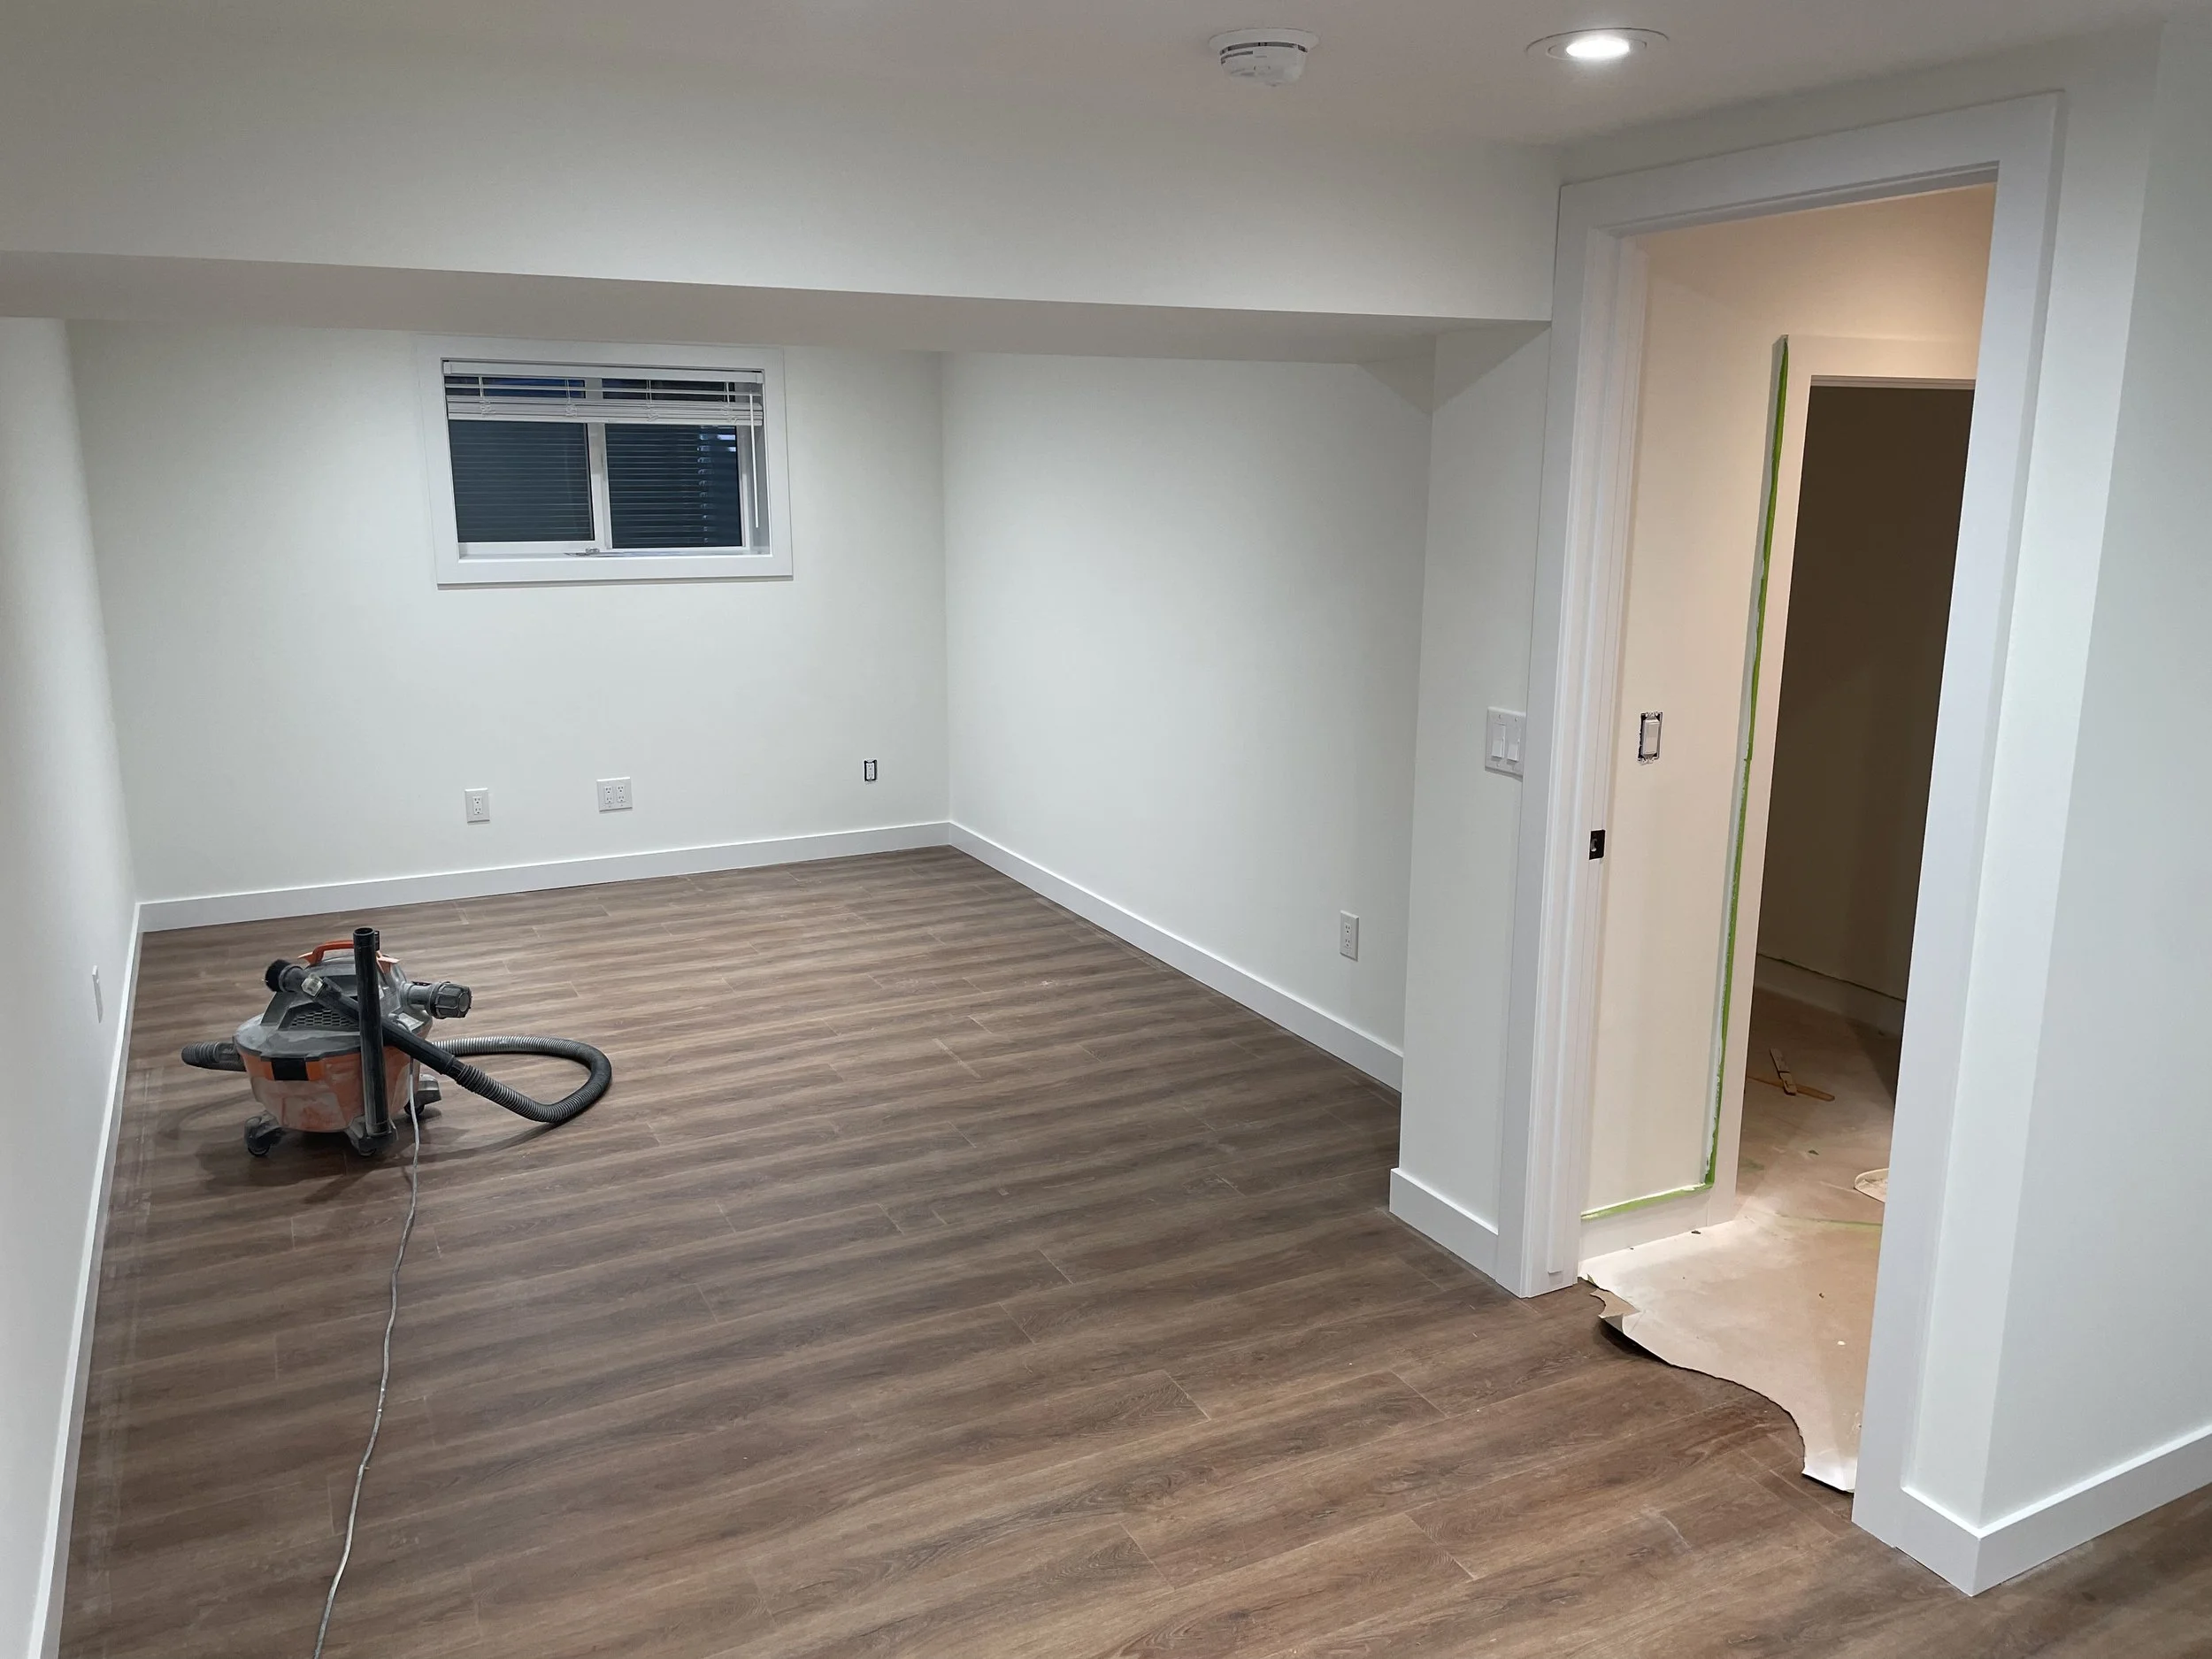
Insulation, drywall, baseboards & paint. The vision of a bright inspiring studio was coming to life. We opted for Oxford White paint, to keep everything bright, while letting the paintings add colour to the space. We chose luxury vinyl plank flooring for its durability, water resistance and for the colour to warm up the stark white space. I was especially excited to see the large storage space and the custom paper storage in the ceiling.
So Close!
The structure of the studio is now complete, It’s even brighter than I anticipated which is awesome! However, after the studio was completed, I had my second baby which meant my limited time in the studio was used for working on paintings, not maximizing furniture and organization in the space. Right now, the studio is functional, but I’m anxiously anticipating a furniture & storage overhall to make the space look pretty and be better organized. For now, the studio is close to feeling entirely complete.
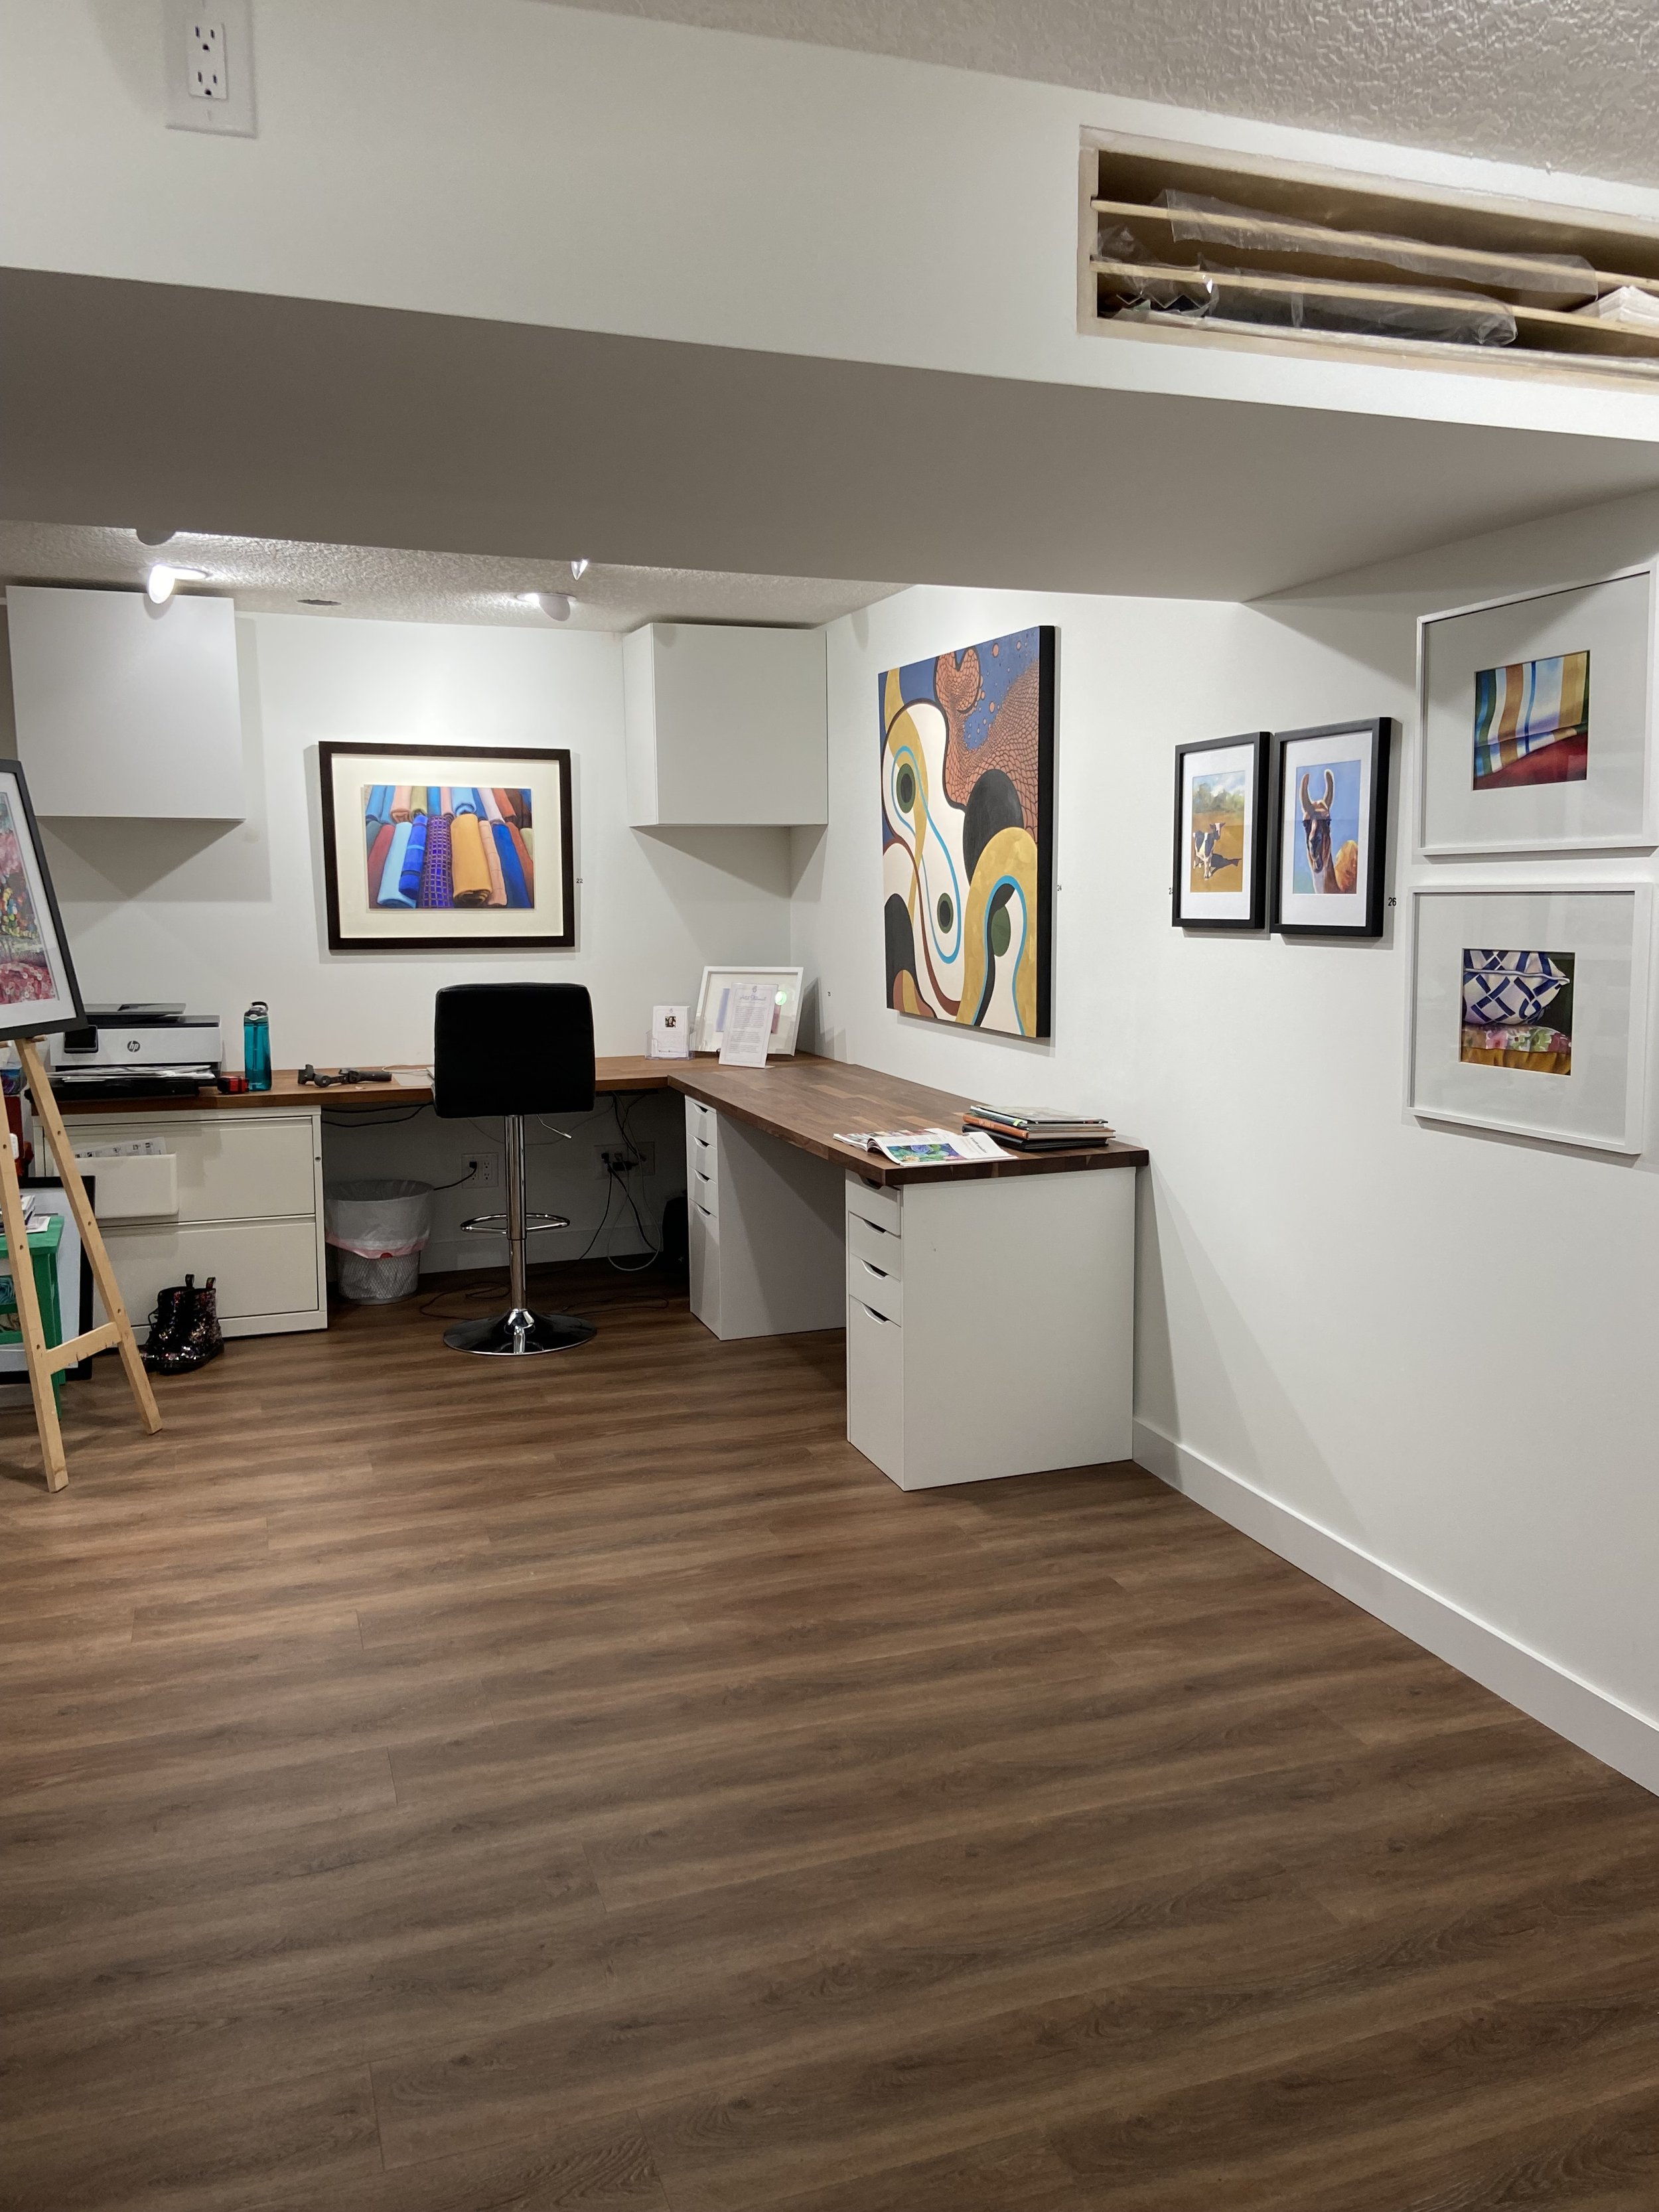
This is what the studio looks now. The residual mess from being deeply engaged in a project. The top photo is where I create my paintings and the bottom photo is where I teach online and do administrative tasks.
Stay tuned for updates and behind the scenes on creating my dream studio.